


PostgreSQL is open source object relational database system (ORDBMS) that uses and extend SQL language with tons of features. It is one of the most sought after RDBMS with many advance features like transactions and concurrency without read locks and more.
The feature rich PostgreSQL helps developers to build applications at ease. Further, a PostgreSQL administrator can easily build fault tolerant environment for PostgreSQL, protect data integrity and manage data-set very efficiently.
In this tutorial, we will explore how to install and configure PostgreSQL along with PgAdmin in an Ubuntu 18.04 instance in details.
Prerequisites
- You can SSH into the Ubuntu 18.04 instance using root or sudo enabled user.
Why use PostgreSQL instead of MySQL
Although MySQL is another popular open source relational database management system and is widely used in large and small organization but PostgreSQL has more advanced features as compared with MySQL and is termed as open-source version of Oracle.
Let us quickly find out few aspects where PostgreSQL has an advantage over MySQL.
- PostgreSQL supports analytic function, which is a way to compare and contrast data stored in the database whereas MySQL does not support analytical function.
- PostgreSQL offers data types to store IPv4, IPv6, and MAC addresses (Network Address Type) whereas MySQL does not support this feature.
- PostgreSQL features materialized views that allow you to store the result of a query physically and update the data periodically.
- PostgreSQL supports CHECK constraint that constrains the value of columns in the table based on a Boolean expression.
- PostgreSQL support FULL OUTER JOIN to query data from two or more tables.
- PostgreSQL supports Partial indexes, Bitmap indexes, Expression indexes.
- PostgreSQL supports JSON and other NoSQL features like native XML support and key-value pairs along with indexing JSON data for faster access. MySQL supports JSON data type but without NoSQL feature. Indexing of JSON is also not supported in MySQL.
Therefore, to avail the benefits of advanced features of relational database management system, it is a good idea to use PostgreSQL.
Install PostgreSQL 11 in Ubuntu 18 – Step-by-Step
Add the PostgreSQL repository
The first thing that you need to do while installing PostgreSQL is to add the repository meant for it. So to do that run the following command from the terminal:
# tee /etc/apt/sources.list.d/postgres.list
deb http://apt.postgresql.org/pub/repos/apt/ bionic-pgdg main
Import signing key
The next step involves fetching the signing key and import it in your system.
# wget https://www.postgresql.org/media/keys/ACCC4CF8.asc
# apt-key add ACCC4CF8.asc
Install PostgreSQL
Finally update the system and install PostgreSQL 11.
# apt update
# apt install postgresql-11
Once PostgreSQL has been installed successfully, the postgres service will run automatically. Issue the following command to find the status of PostgreSQL server.
# systemctl status postgresql
During installation process, following users and a database will be created.
- A Linux user by the name postgres will be created. All data files and processes meant for running PostgreSQL server will be owned by this user.
- One database by the name postgres will be created.
- A PostgreSQL user also by the name postgres will be created.
Connect to PostgreSQL server
To connect PostgreSQL server, you can use a PostgreSQL clients like psql or by using any other application of your choice. The client connect to the PostgreSQL server by using one of the IPC mechanisms, either through Unix domain sockets or through TCP sockets.
The advantages of using Unix domain sockets is its ability to validate the system user id of client connection.
By default, the PostgreSQL server listens for connections through Unix domain sockets only. Lets connect to the PostgreSQL server by leveraging the system user postgres.
Navigate to the shell of system user(Linux) postgres using the following command.
# su - postgres
Now type psql from the shell of postgres.
postgres@pg:~$ psql
psql (11.4 (Ubuntu 11.4-1.pgdg18.04+1))
Type "help" for help.

postgres=#
There are three ways to authenticate users in PostgreSQL and they are:
- Peer method trust the identity of any LINUX users. Therefore it will not ask for any password
- MD5 method will always ask for a password and validates after hashing with MD5
- Trust will never ask for a password and will always trust any connection
The default method of authenticating local (Linux) user is peer. That is why we were able to connect PostgreSQL server earlier. Trying to connect to the PostgreSQL server using password based scheme at this moment will results in Peer authentication failure.
root@pg:~# psql -U postgres
psql: FATAL: Peer authentication failed for user "postgres"
To implement password based authentication scheme, first of all, update the password for PostgreSQL user postgres.
To do that run the following set of commands from the terminal.
root@pg:~# su - postgres
postgres@pg:~$ psql
postgres=# ALTER USER postgres PASSWORD 'myPassword';
ALTER ROLE
Next edit the PostgreSQL configuration file and change the connection method to MD5 from peer for user postgres.
# vi /etc/postgresql/11/main/pg_hba.conf
...
...
# Database administrative login by Unix domain socket
local all postgres md5
...
...
Save the file and restart PostgreSQL server and from now onward you will be able to connect to the server by using password based authentication scheme and this will make your server more secure.
# systemctl restart postgresql
# psql -U postgres
Password for user postgres:
psql (11.4 (Ubuntu 11.4-1.pgdg18.04+1))
Type "help" for help.
Install pgAdmin 4
pgAdmin is an open source, web based GUI administration tool for managing PosrgreSQL instances. With pgAdmin, one can configure PosrgreSQL database settings, monitor performances and even write SQL queries.
To install pgAdmin 4, just issue the following command from the terminal. This will install few other additional packages and dependencies.
# apt install pgadmin4 pgadmin4-apache2
During installation process, pgAdmin will prompt for providing an email id which in turn will be used as an admin login id for the pgAdmin 4 web interface.
Next the installer will prompt for the administrator’s Password.
The installation of pgAdmin 4 will be over within a minute. Point your favorite web browser to http://your_ip_address/pgadmin4/ and subsequently you will be greeted with a login page.

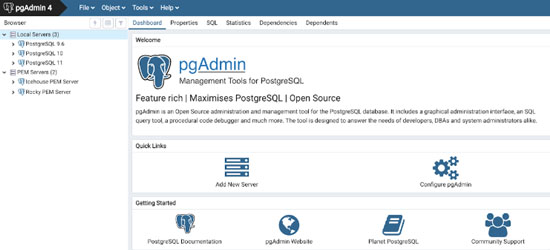
Provide the email address and password that you had supplied during the installation process and hit the ‘Login’ button. You will be redirected to PgAdmin4 dashboard.
To add a PostgreSQL instance, choose the “Add New Server” option from the dashboard. A popup page will appear. Provide the name of the connection under ‘General’ tab.
Under connection tab, provide host name or address of PostgreSQL server, port number, username and password. The password is the same that we have updated using PSQL previously. Hit the “Save” button to complete the process.
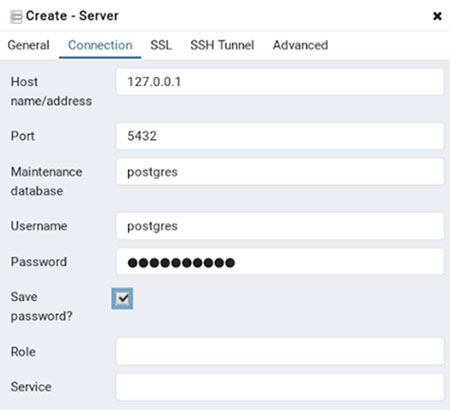
The newly added PostgreSQL instance will be added immediately in the left sidebar under “Servers” section.
Add few more instances of PostgreSQL instance and administer them though web interface of PgAdmin 4 at ease.
Closing Thoughts
In this tutorial we have explored about the advantages of PostgreSQL over MySQL, then go into the detail and shared step-by-step guide for installing PostgreSQL in Ubuntu server configuring the database to work with Ubuntu 18.04.
Apart from installing the PostgreSQL we also explored and showed how to install and configure pgAdmin 4 (client for PostgreSQL ) and shown how to administer PostgreSQL database using pgAdmin 4 in Ubuntu 18.04.
To know more about PostgreSQL, you can always browse its official documentation.
This PostgreSQL installation is also applied to the Ubunut 16 and earlier versions with slightly and sometime no change at all in running and executing installation and configuration commands.


")


